Compiling and Installing Utimaco HSM Device Driver for RHEL kernel
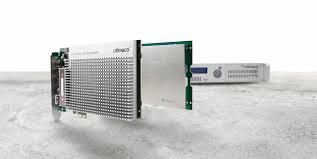
Utimaco is a leading manufacturer of Hardware Security Modules (HSMs) that provide the Root of Trust to all industries, from financial services and payment to the automotive industry, cloud services to the public sector. Installation instructions given in the manual and read me are a bit complicated. There are few incomplete instructions related to RHEL. I am going to share a simple way to complete this process. Compiling and Installing Utimaco HSM Device Driver for RHEL kernel in just few steps. This process was completed on a complete new and stand alone system.
The first step is to resolve the dependencies for Compiling and Installing Utimaco HSM Device Driver for RHEL kernel. All commands are for RHEL 7.4, for other Linux flavors, follow read me or installation manual. This post is for RHEL administrators only. RHEL Administrator must have resolved the issue of Yum installation. Yum must be working, follow the instructions given in the URL to configure YUM on RHEL without any subscriptions.
https://www.percona.com/doc/percona-server/5.7/installation/yum_repo.html
yum list installed “kernel-*”
cat /etc/redhat-release
Compiling and Installing Utimaco HSM Device Driver for RHEL kernel
- the Linux headers for your active kernel must have been installed.
Nowadays, every major distribution has a package for the headers.
E.g. Debian Jessy 64-bit has a meta-package named “linux-headers-amd64”. It is called “kernel-devel”. - root privileges on the machine are required.
- gcc is required
- RPM command will be used to install the required dependencies, Copy the requried RPMs from RHEL 7.4 DVD to any directory.
- Commands with RPMs
- rpm -ivh libmpc-1.0.1-3.el7.x86_64.rp – ignore if already installed
- rpm -ivh cpp-4.8.5-16.el7.x86_64.rpm – ignore if already installed
- rpm -ivh kernel-headers-3.10.0-693.el7.x86_64.rpm – ignore if already installed
- rpm -ivh glibc-headers-2.17-196.el7.x86_64.rp – ignore if already installed
- rpm -ivh glibc-devel-2.17-196.el7.x86_64.rpm – ignore if already installed
- rpm -ivh glibc-common-2.17-196.el7.x86_64.rpm – ignore if already installed
- rpm -ivh gcc-4.8.5-16.el7.x86_64.rpm
- rpm -ivh kernel-devel-3.10.0-693.el7.x86_64.rpm
RHEL:
- Install module by executing ‘make install’
- Create the device node using udev:
mknod /dev/cs2 c 244 0 - Set the needed file permissions:
chmod 666 /dev/cs2 - Add a line “modprobe cs2” to the file /etc/rc.modules to have this kernel module started upon boot time.
If the file doesn’t exist, create it. The file has to be executable. - Copy ’10-cryptoserver.rules’ to /lib/udev/rules.d/
If ’10’ interferes with your udev rules, feel free to change this value.
The CryptoServer is now available to all users under the device /dev/cs2.X with X=0 if you have one CryptoServer installed,
X=1 if you have two CryptoServers installed, etc.
IMPORTANT: The CryptoServer can no longed be accessed via /dev/cs2 ! - Reboot the machine
How to TEST if the installation were successful:
- Check that udev has created the device node:
ls /dev/cs2 or /dev/cs2.0 (if you have installed the udev rule)
- Check that the kernel module is running:
lsmod | grep cs
How to check if the installation worked as expected
Test Utimaco HSM using csadm too
Copy the tool from Utimaco HSM DVD. Navigate to /x86-64/Administration and enter the under given command.
./csadm GetState
You will get the similar to below listed output from the above command
mode = Operational Mode
state = INITIALIZED (0x00100004)
temp = 29.4 [C]
alarm = OFF
bl_ver = 5.01.4.0 (Model: Se-Series Gen2)
hw_ver = 5.01.4.0
uid = a500001a a7d03f01 | ?
adm1 = 53653135 30302020 43533637 30303932 | Se1500 CS670092
adm2 = 43727970 746f5365 72766572 20435035 | CryptoServer CP5
adm3 = 494e5354 414c4c45 44202020 20202020 | INSTALLED