What is Kernel Import PST to Office 365?
Kernel Import for Office 365 as the name suggests is a tool to import PST files to Office 365. The tool can import PST files items like attachments, calendar, emails, tasks, etc. to Office 365’s Primary, shared, public, and archived mailboxes. In addition to this it can be used to perform several other tasks like importing OST files to Office 365, bulk migration, map CSV file, and can perform multiple migration.
It allows the user to customize their migration experience by providing advanced filter options, where the user can select what they want and what they do not. One of the most advanced features is that if you have already migrated PST files once, then on the next migration the software will skip already imported items.
It allows the user to save the snapshot in case someone wants to resume their process, with the help of the saved snapshot the previous steps can be skipped.
The user interface is quite simple to operate, and it is supported by all versions of Windows and Outlook.
Basic Highlights of the Tool
- Import PST files to Office 365 mailboxes
- Provide customization
- Migrate with 100% data integrity
- Installing Outlook is not necessary
- Allows bulk migration
- Provide a snapshot option to resume the work
- Comes with a detailed software guide
- Comes in a Trial version
About Installation:
System Requirements:
- Supported Versions
Outlook PST File: 2019/ 2016/ 2013/ 2010/ 2007/ 2003/ 2002/ 2000/ 98 and 97
- Operating System
Windows OS Platforms – Windows 10/ 8.1/ 8/ 7/ Vista/ XP/ 2000/ 98/ NT and 95 and Windows Server 2016/ 2012/ 2008 R2/ 2008/ 2003 R2/ 2003
- Processor
Pentium Class Memory + Hard Disk128 MB Minimum 50 MB of disk space.
License Type:
- Home License
Can be used on a single system
- Corporate License
Can be used on multiple systems within an organization
- Technician License
Can be used by service providers for multiple organizations
How to Use Kernel Import PST to Office 365
We have discussed every important thing about the software except how it works, let’s see how it looks and works.
- Add Files

In this step, you need to add files where you will see two options
- Add Source: In this section, you need to add single or multiple healthy PST/OST files.
- Add Destination: Here you need to add your Office 365 account details to sync the mailboxes
Other Options Available
On the leftmost side on the app, you will notice a few icons
- Home Page: Symbol like denotes homepage and
- Video Tutorial: You can understand software better with its video tutorial
- About: In this section, you can get the details of the software
- Contact Support: Click on this icon, and you can get 24*7 help and support facility if you have encountered any problem during your experience.
- Buy Online: If you wish to buy the software then click on this cart icon and proceed
- Download Sample CSV File: Here you can get a sample of CSV file if you want to have a look at it
- Import From CSV: With this, you can import CSV files from your system.
- Enter Login Details and synch
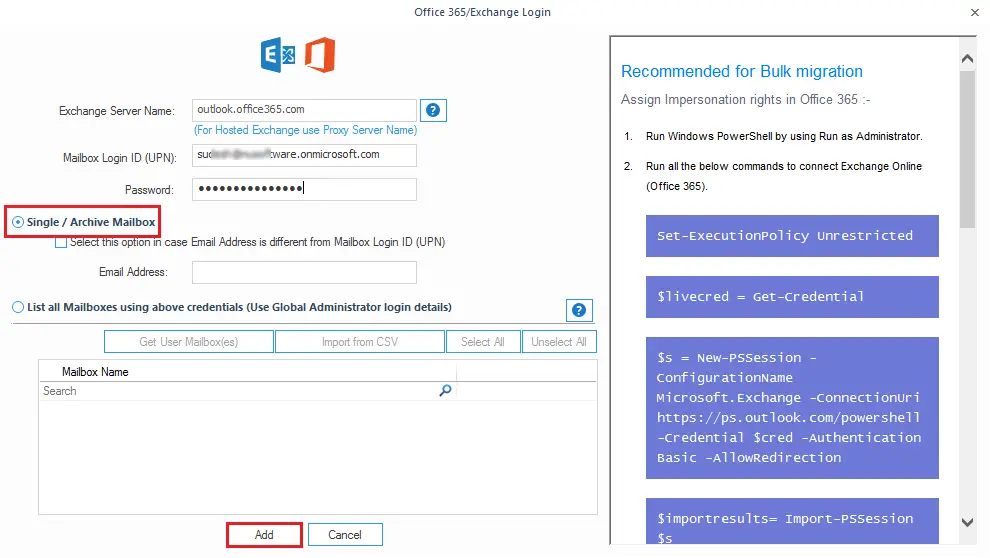
In this step, you need to enter your login details in order to synchronize your mailboxes. There are two options for the selection of mailboxes; single and multiple.
- Single/Archive Mailbox: With this, you can select the single mailbox, by clicking on Add.
- List all Mailboxes using above Credentials (Use Global Administrator login details): With this, you can select multiple mailboxes. For this, click on Get User Mailbox(es).
Select your options and proceed.
- Map PST/OST Files
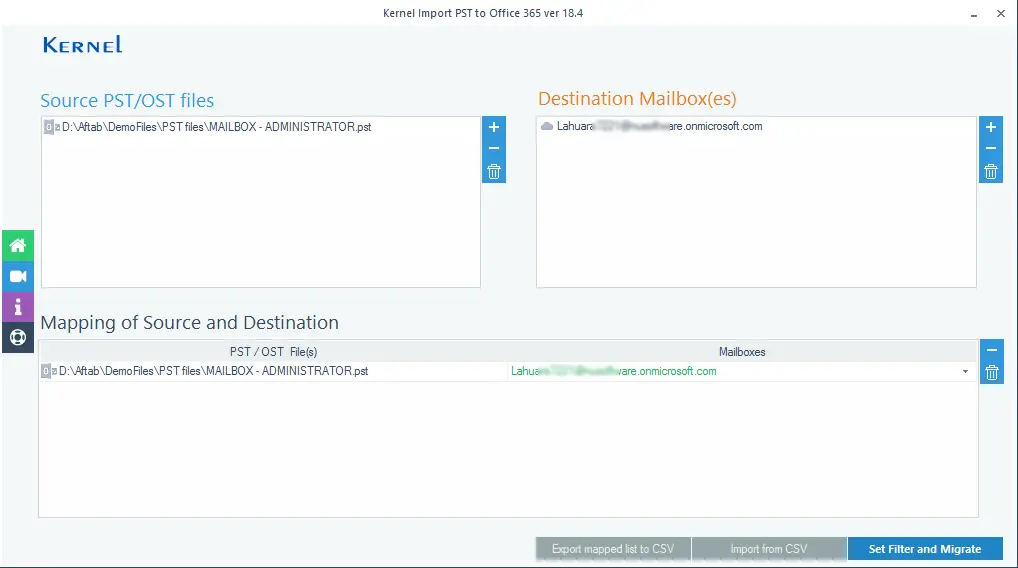
Now, you will see that you have successfully added Source files and Destination Mailboxes. Under the section ‘Mapping of Source Destination’ select your preferable mailbox and proceed.
- Migration Type Selection
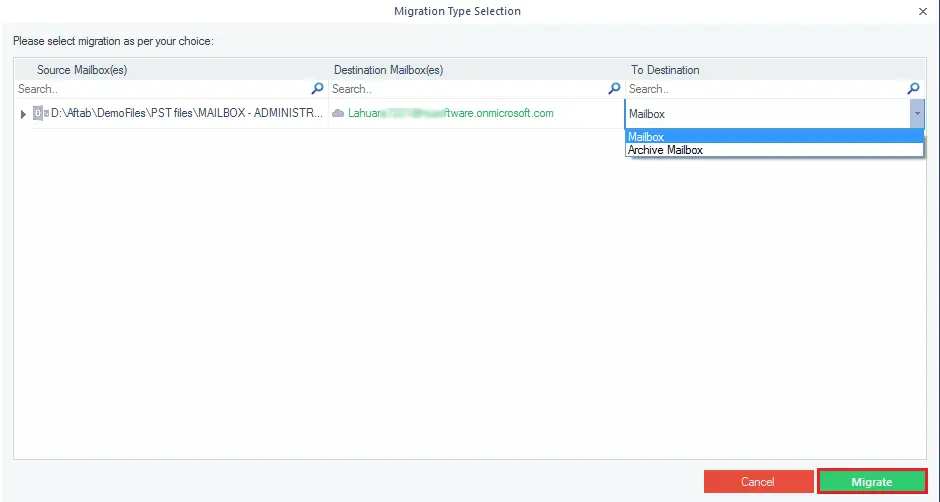
This window allows you to set the destination which includes Mailbox, Public Folders, and Archive Mailbox. Start migration by clicking on the Migrate button.
- Apply Filters
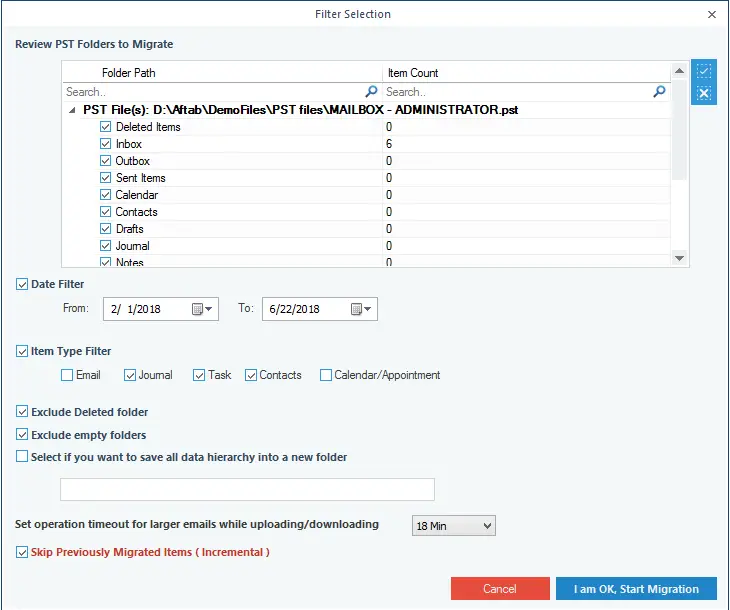
Here, you need to apply desirable filters in respect to Date, Item type (Email, Journal, Task, Contacts, Calendar), Include or Exclude deleted folders, Include or Exclude Empty Folders, Data hierarchy, and Time Out details. Set filters and start Migration.
- Save the Report
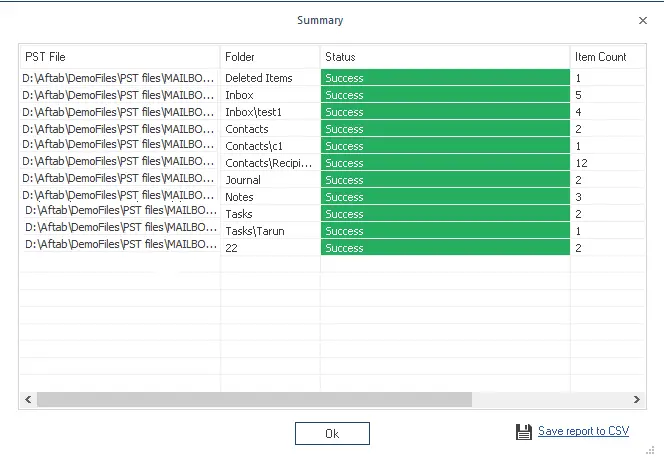
Once the migration process is over save your report and you are done.
Note: This is a Guest Post