Microsoft SQL Server 2016 Cluster Setup Using Hyper-V Virtual Machines
Some key points:
- The user which you are going to be used in SQL clustering setup must be the part of Domain Admin group and be the local administrator in both machines
- Hyper-V is required in case you need to use NIC teaming and use interfaces for different use on physical machines
- Format partitions in GPT format if you need replication while attaching storage in both nodes iSCSI initiator.
Preparation of Windows Server 2016 Virtual Machines for Microsoft SQL Server cluster
Steps:
- Install Windows Server and allow SQL ports in windows firewall or disable firewall on both physical machines/VMs.
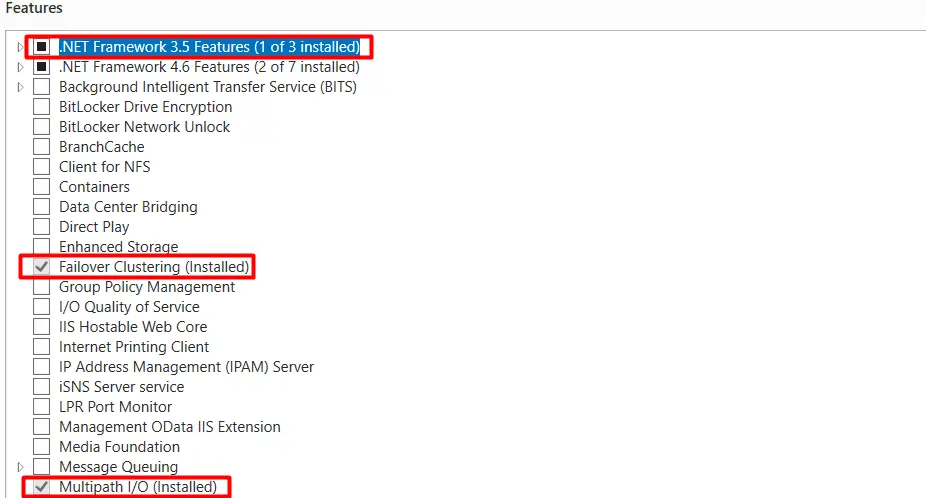
- Install Failover Clustering, Multipath I/O and .Net Framework 3.5 features, Hyper-V on both SQL Servers Nodes from Server Manager console.
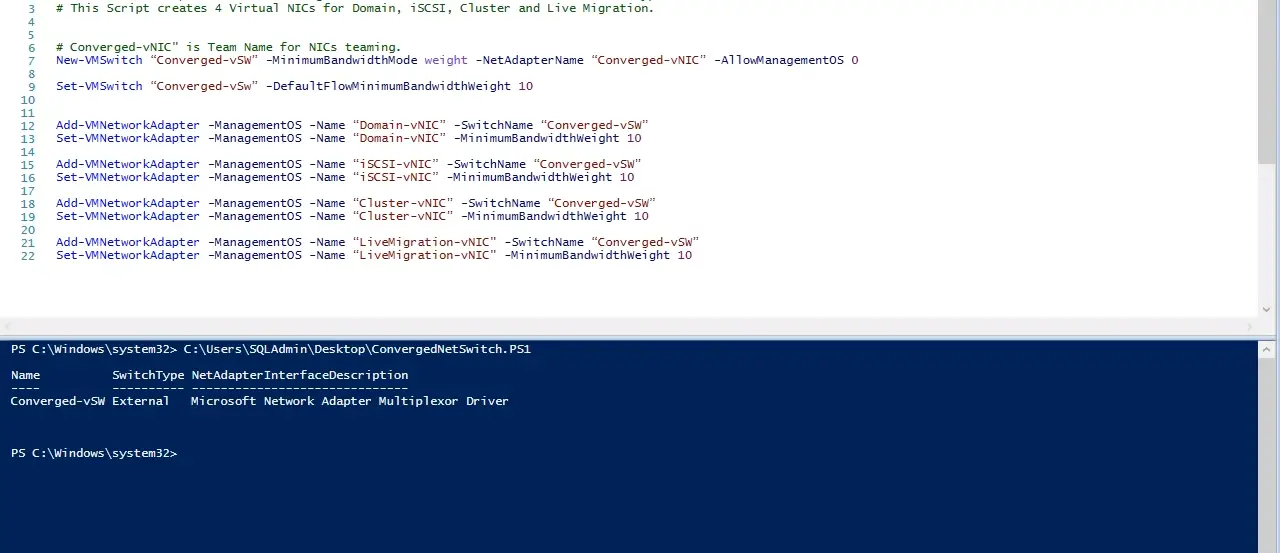
- If you are using physical machines then create NIC Teaming (if required to split the traffic from separate interface e.g.: cluster IP, live migration IP, iSCSI IP, DC IP), converged network and configure IP address. You can run script to create converged network in both machines:
# Powershell Script To Create Converged Fabris For Clustered Windows Server 2016 Hyper-V Host
# This Script creates 4 Virtual NICs for Domain iSCSI Cluster and Live Migration.
#”Converged-vNIC” is Team Name for NICs teaming. New-VMSwitch “Converged-vSW” -MinimumBandwidthMode weight -NetAdapterName “Converged-vNIC” -AllowManagementOS 0
Set-VMSwitch “Converged-vSw” -DefaultFlowMinimumBandwidthWeight 10
Add-VMNetworkAdapter -ManagementOS -Name “Domain-vNIC” -SwitchName “Converged-vSW” Set-VMNetworkAdapter -ManagementOS -Name “Domain-vNIC” -MinimumBandwidthWeight 10
Add-VMNetworkAdapter -ManagementOS -Name “iSCSI-vNIC” -SwitchName “Converged-vSW” Set-VMNetworkAdapter -ManagementOS -Name “iSCSI-vNIC” -MinimumBandwidthWeight 10
Add-VMNetworkAdapter -ManagementOS -Name “Cluster-vNIC” -SwitchName “Converged-vSW” Set-VMNetworkAdapter -ManagementOS -Name “Cluster-vNIC” -MinimumBandwidthWeight 10
Add-VMNetworkAdapter -ManagementOS -Name “LiveMigration-vNIC” -SwitchName “Converged-vSW” Set-VMNetworkAdapter -ManagementOS -Name “LiveMigration-vNIC” -MinimumBandwidthWeight 10
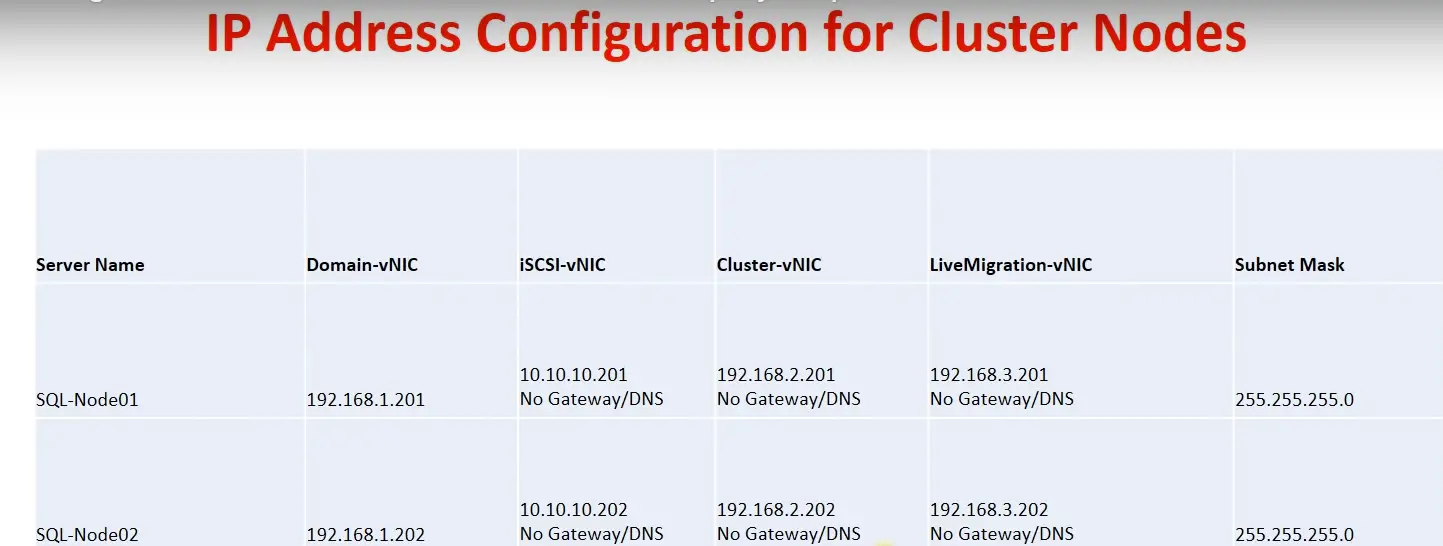
Network Adadptors will appear in Network Connections:

e.g. for IP scheme settings in case of NIC Teaming and Converged network settings:
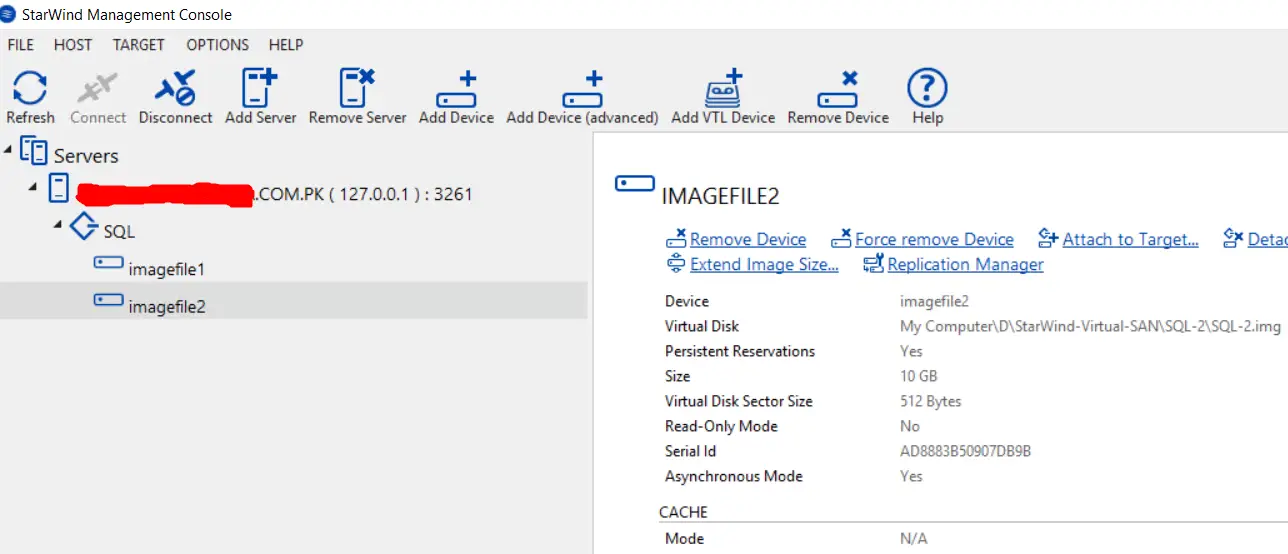
- Create and configure High Available Storage depends on your environment. I am using Starwind Virtual SAN to create storage.
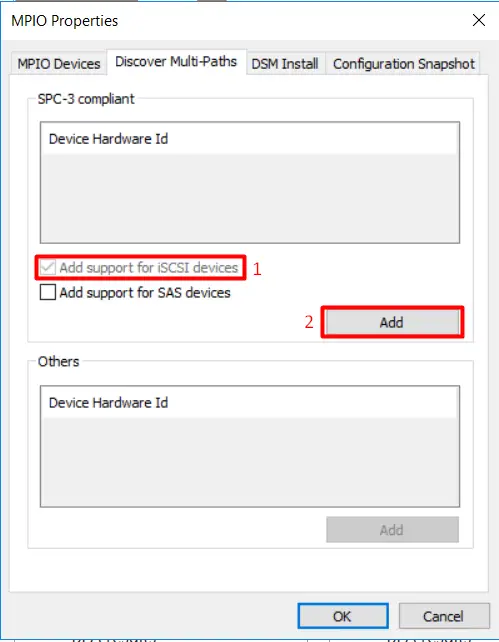
- Open MPIO Properties from installed feature in Server Manager console. Select “Add support for iSCSI devices” then press add button and restart server as the popup will appear to restart machine to take effect. Do repeat same process in other machine.
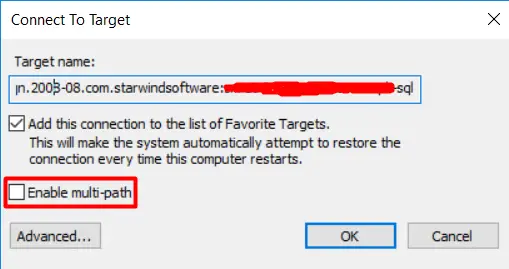
- After restarting both machines go to server Manager and select iSCSI initiator and discovering iSCSI target and add disks to both nodes. To do this put IP address in Target and press Quick Connect button to get connected with Storage server. The Name will be displayed under discovered targets with status. Disconnect once the target and connect button again to enable multi-path option. Below mentioned is the snapshot to enable multi-path.

Go to Disk Management and you can find the Disks will appear which we configured in SAN settings in above section. Bring both disks online and initialize disks with MBR/GPT partition style as per your requirement. Create simple volume for both disks and assign drive letter. For best practice change the drive letter of CD-ROM and assigned both drive letters in sequence in both machines so that there will be no manipulation at later stage. Please note If you want replication in SQL Clustering then you must format partitions in GPT style.
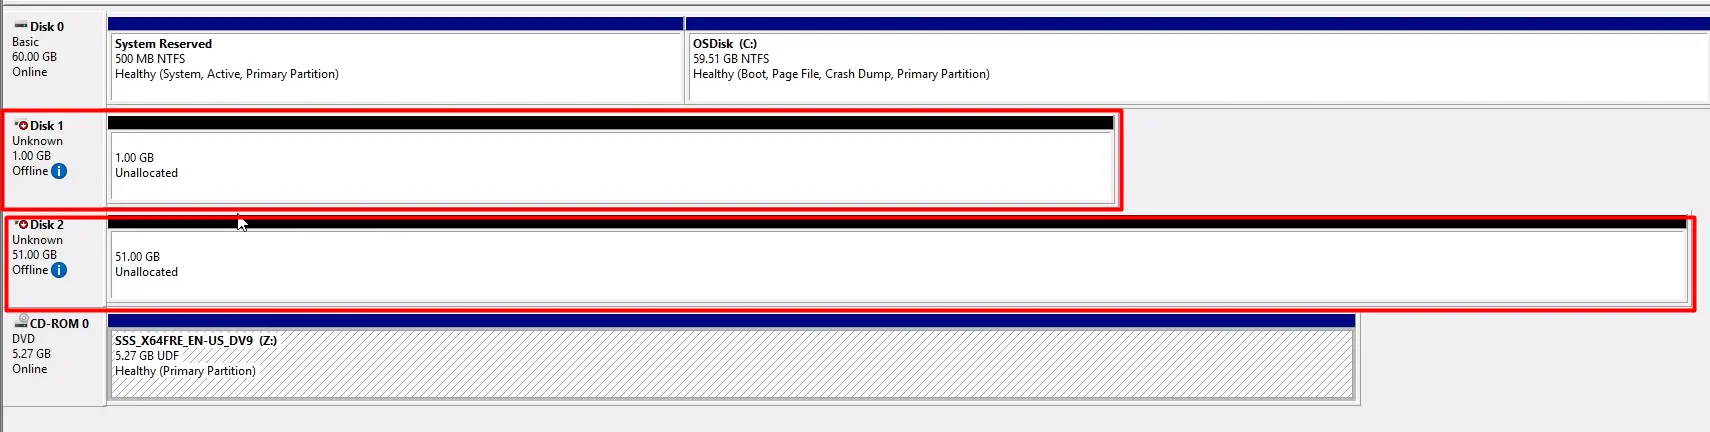
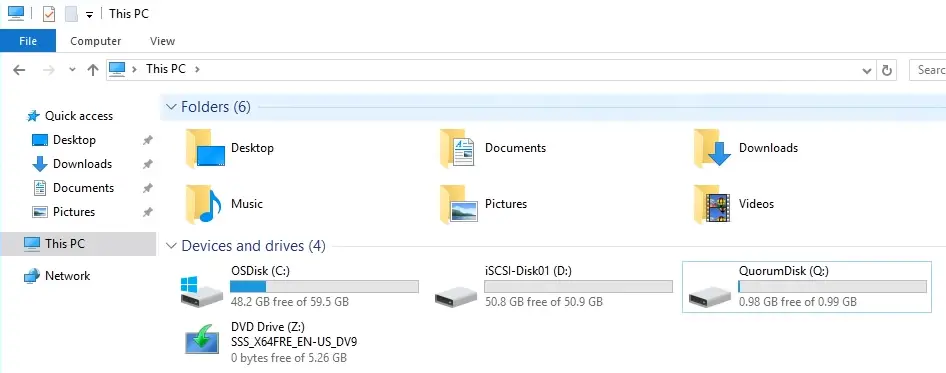
Repeat Step 6 in 2nd machine until enable multi-path option and you will find both drives in Disk Management. Assign same drive letters as you assigned in 1st machine.
SQL Clustering Setup on Two Nodes
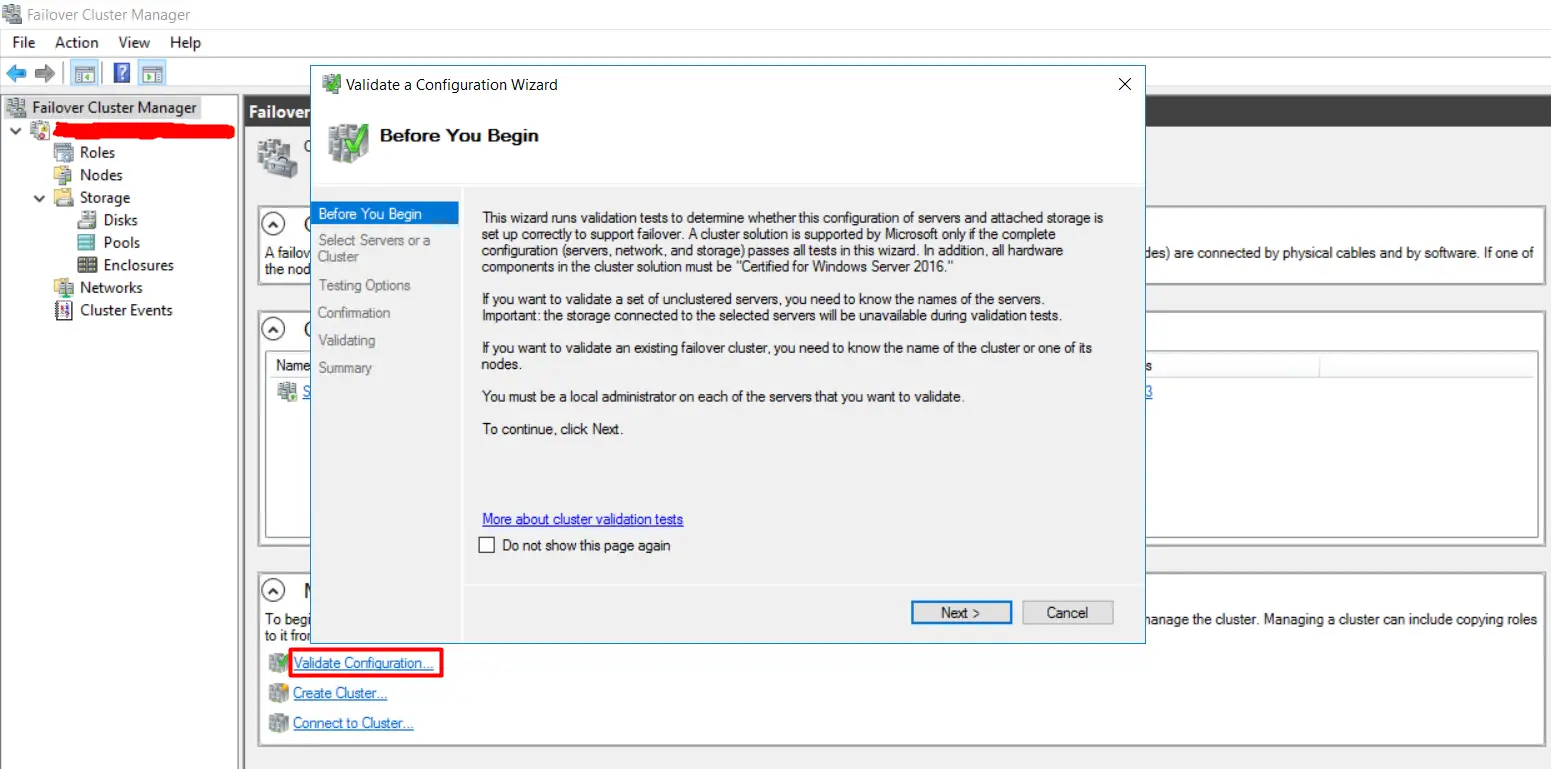
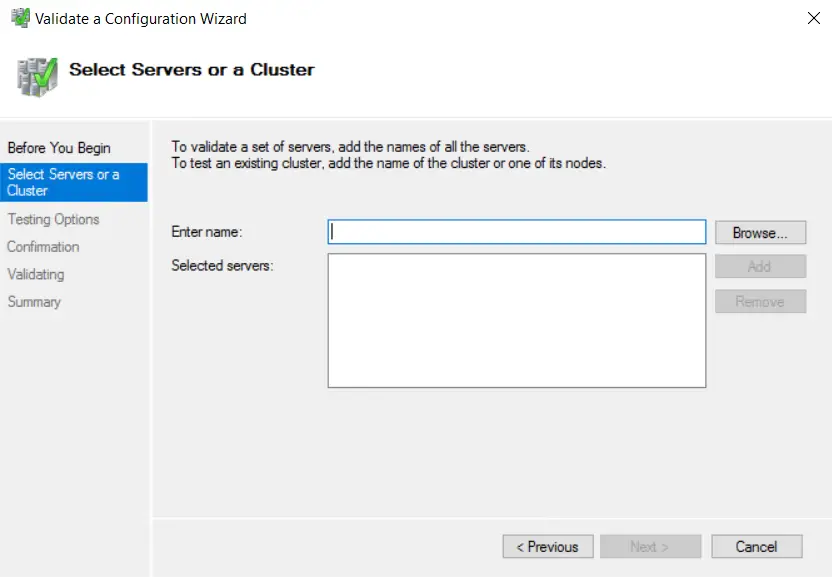
- Create windows failover cluster and modify cluster disk and network settings in Validation configurations. Open Failover Cluster Manager from Server Manager and select Validate Configuration to run Wizard. Click on browse and enter the name of both SQL nodes to run Test for both nodes.
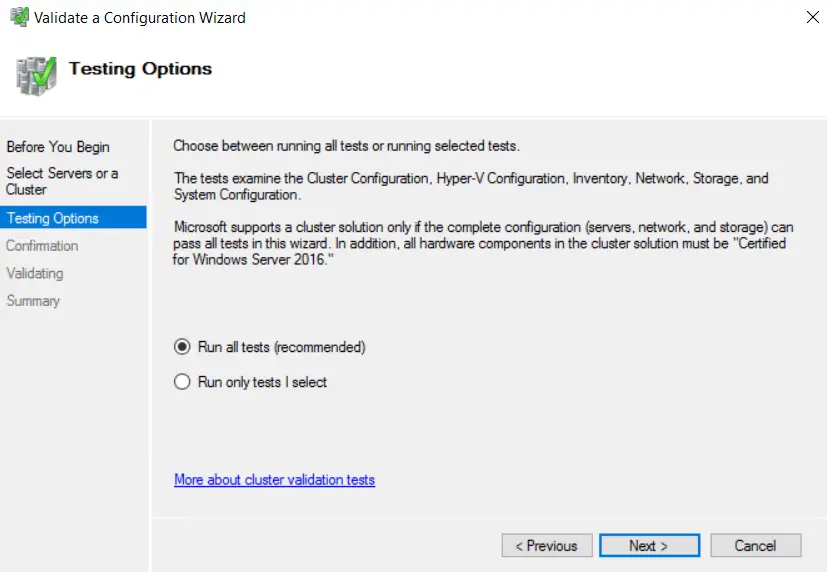
After run all test and get the summary page, you must select “Create the cluster now using the validated nodes…” option and click on finish.

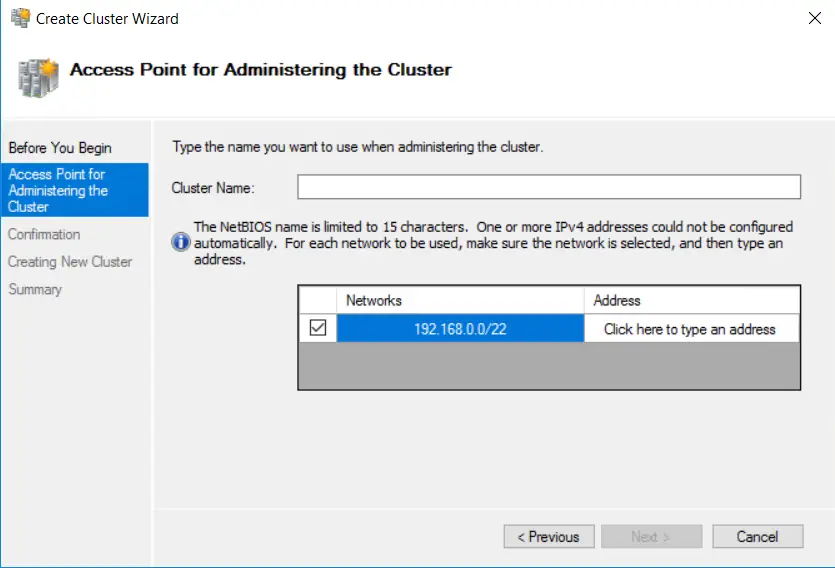
Create Cluster Wizard windows will appear automatically after you finished test wizard. Press next and provide cluster name and give IP in Address section. (This IP will be assigned to Virtual Computer which will be automatically created in Active directory users and computers under Computers section as Failover cluster virtual network name account):
You must select “Add all eligible storage to the cluster.” Option and press next.

After this wizard will run the deployment process and will take approximately 5 minutes to finish depend on your network and machines performance.
Installation of Microsoft SQL Server 2016 using FailOver Cluster
- Install SQL Server 2016 failover cluster on SQL Node1 by selecting New SQL Server failover cluster installation option from SQL Server installation Center.

Perform steps of Product Key, license terms, global rules, Microsoft updates, install setup files, feature selection, feature rules and then provide instance configuration:
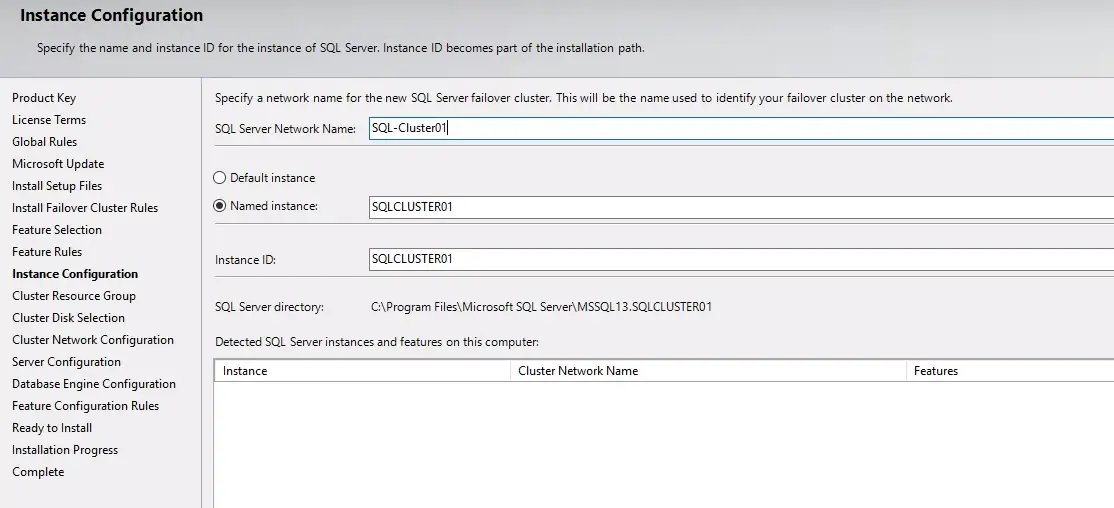
Select SQL Server cluster resource group name and click next:

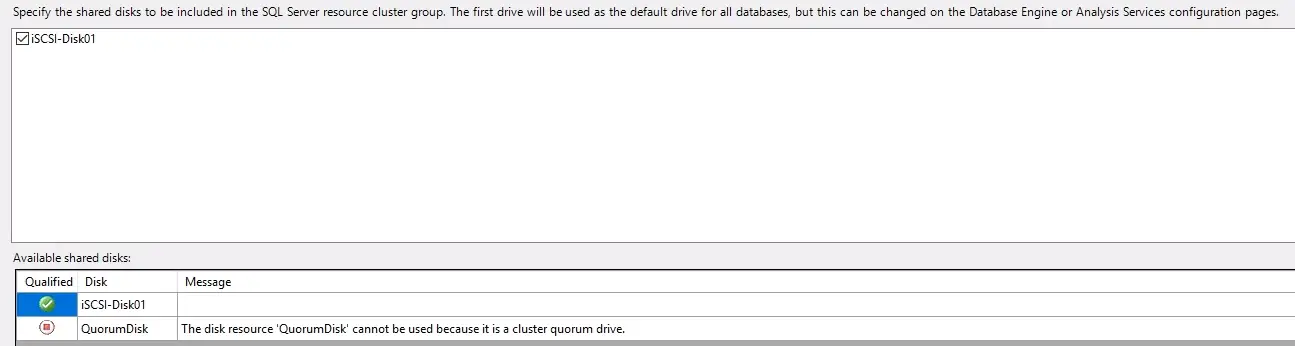
ISCI Disk will appear in cluster Disk Selection and just click next to proceed installation process:
Provide IP address for failover cluster under Cluster Network Configuration:

Provide Account Name and password for server configuration:

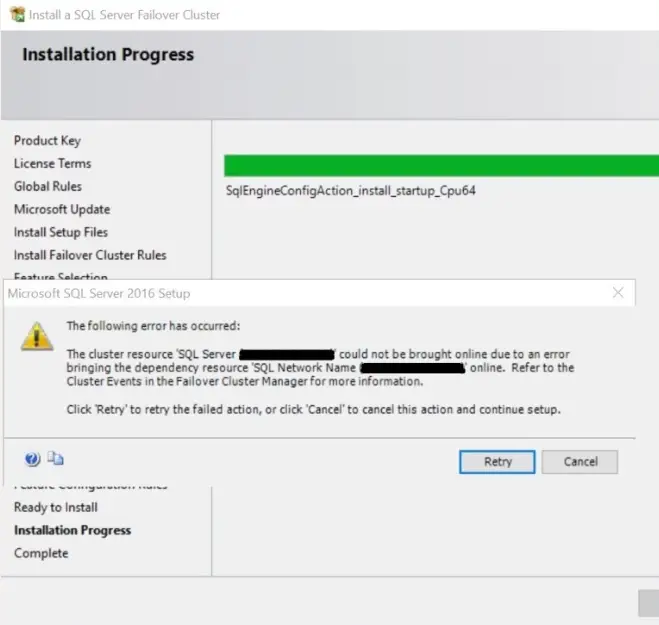
Perform remaining steps to install SQL server on 1st machine as New SQL Server failover cluster installation process:

NOTE: It might be possible that while creation of SQL server object in AD, you will get error while installation:
You can also find the error in Failover Cluster Manager under Cluster Events:
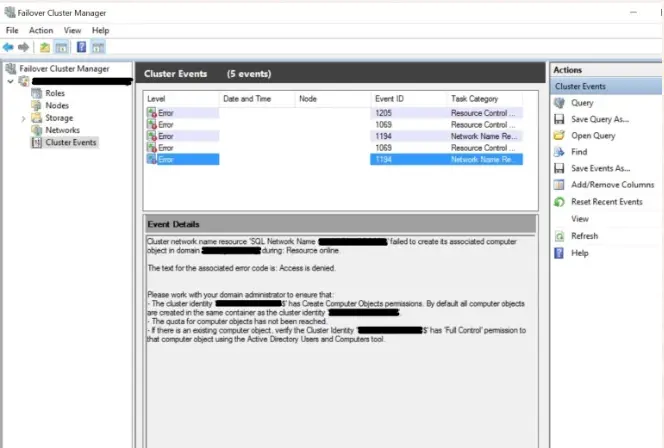
Resolution:
We can also “Pre-Stage” the VCO, which is useful in situations where the Domain Administrator does not allow the CNO “Read All Properties” and “Create computer Objects” permissions:
– Ensure that you are logged in as a user that has permissions to create computer objects in the domain.
– Open the Active Directory Users and Computers Snap-in (dsa.msc).
– Select View -> Advanced Features.
– Right click the OU/Container you want the VCO to reside in and click “New” -> “Computer”
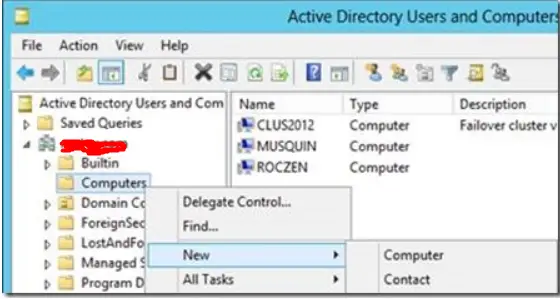
-Provide a name for the object (This will be your SQL Server Network Name) and click “OK”:

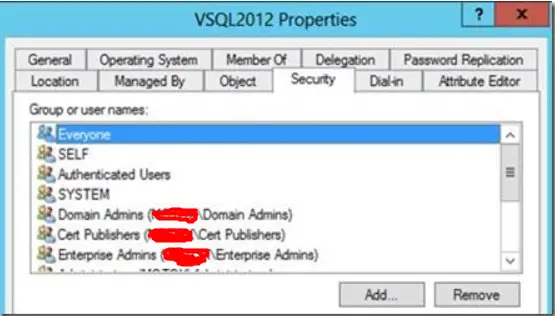
– Right click on the on the VCO you just created and select “Properties”. Click the security tab and then click “Add”:
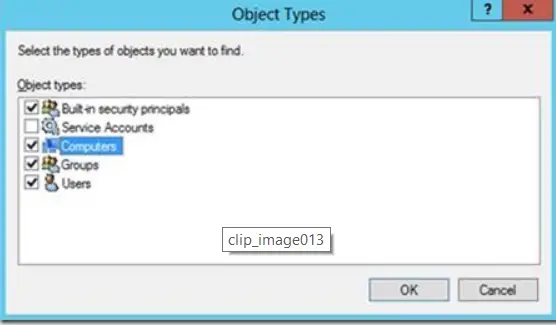
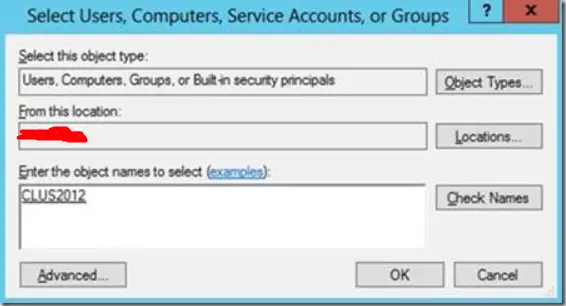
– Enter the CNO (Make sure to select “Computers” option in the “Object Types” window) and click “OK”.
– Highlight the CNO, check the following permissions, and click “OK”.
*Note: You can replace step #8 by giving the CNO “Full Control” over the VCO
– Press retry button in Installation of SQL Server and the Network Name resource should start without issue.
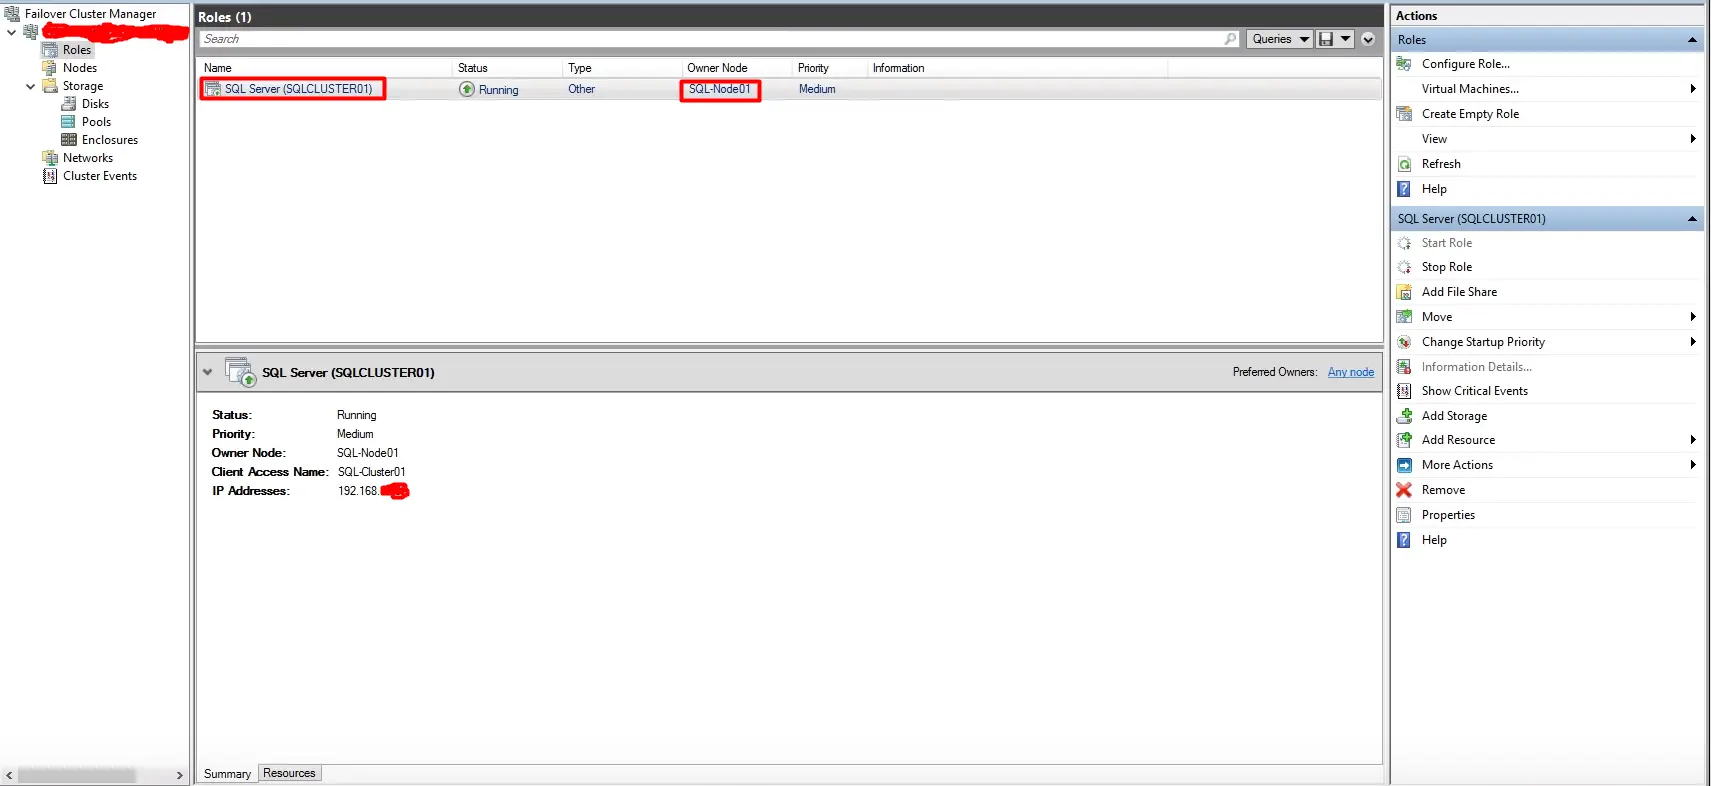
- Open failover cluster manager and verify under SQL cluster Role that owner node must be the SQL-node 1 where we installed SQL Server with the status Running.
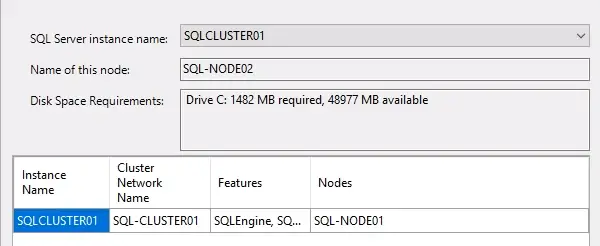
- Add Node of SQL Server 2016 cluster in 2nd machine by selecting Add node to a SQL Server failover cluster option from SQL Server installation Center.

Perform steps of Product Key, license terms, global rules, Microsoft updates, install setup files, Add Node Rules, and then provide Cluster Node Configuration, just click next as we have only one SQL Server Instance name and it is selected by default:
In Next step, just check the Cluster Network Configuration and press next as it will detect the network settings and IP Address automatically:

Provide Service accounts password here as setup will not allow you to change account and services startup type.
To test the other node configured properly. Just go to failover Cluster Manager and Move node to best possible node which is Node 2 in our case:
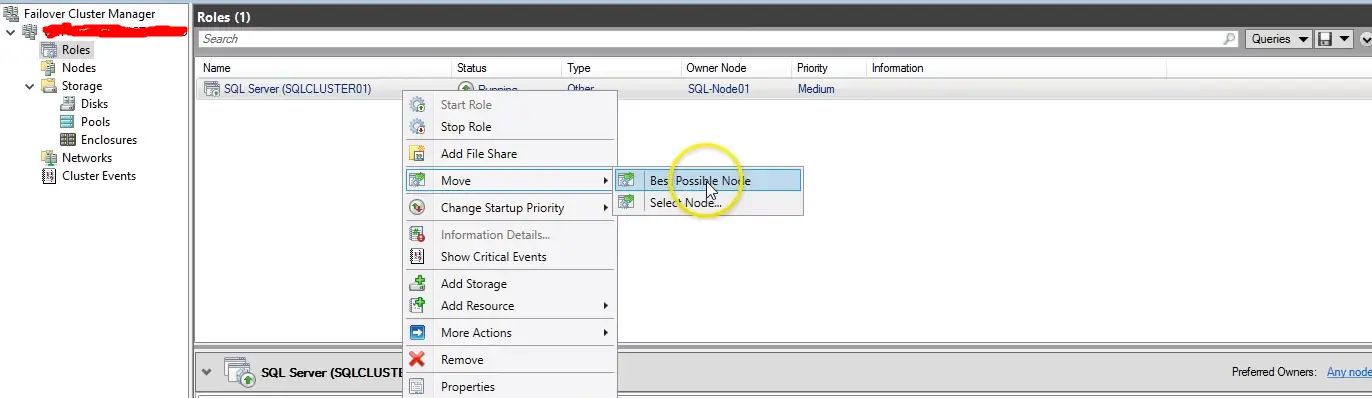
After 5-8 Seconds, you will find that the Owner Node is being shifted to Node 2.

As soon as I enabled Hyper V using Windows 10 V.1709, the internet connection via LAN and WIFI refused all the time. Maybe someone has a similar Problem. I found the solution in this blog here (in German) :