[Solved] Upgrade Confluence from 5.x to Most Recent
This post is only for IT administrators working on Atlassian Confluence upgrade. Confluence is a tool to organize your product documentation. This post will cover “upgrade confluence 5.x to recent version”.
Atlassian Confluence (v 5.5.2) Installation and Configuration.
Confluence Installation Steps.
- Download Confluence
Download the installer for your operating system – https://www.atlassian.com/software/confluence/download
2. Run the installer
Run the installer. We recommend using a Windows administrator account.
Follow the prompts to install Confluence. You’ll be asked for the following info:
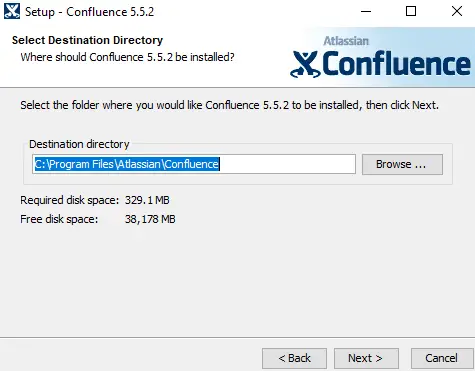
a: Destination directory – this is where Confluence will be installed.
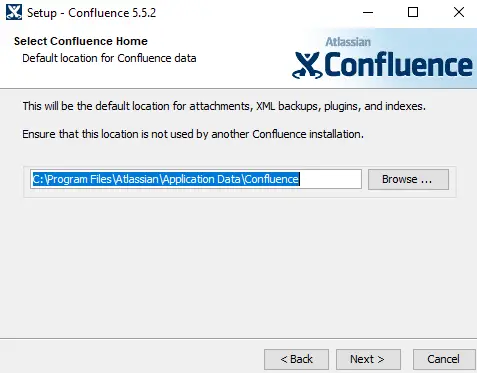
b: Home directory – this is where Confluence data like logs, search indexes and files will be stored.
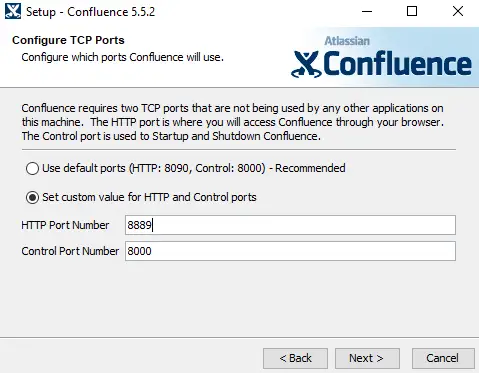
c: TCP ports – these are the HTTP connector port and control port Confluence will run on. Stick with the default unless you’re running another application on the same port.
d: Install as service – this option is only available if you ran the installer as administrator.
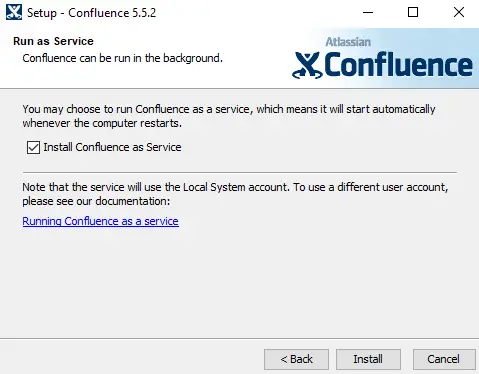
- After the installation process is completed, you will be redirected onto your browser for further configuration process.
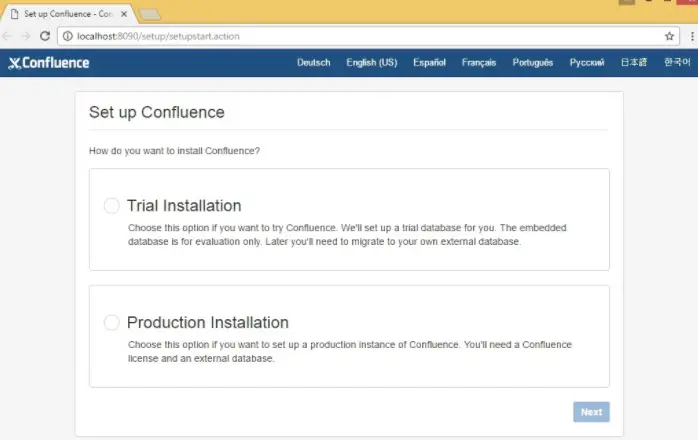
- Trial Installation– Just as the described words, the only reason why you should use this installation is for ‘Testing purpose’. Even for personal wiki, you should consider yourself to set under Production Installation category.
Trial installation is a no-frills installation with ’embedded DB’. This impacts performance purposes greatly in future.
- Production Installation– This is for any usage of Atlassian Confluence for long-term purpose usage. We will select Production Installation.
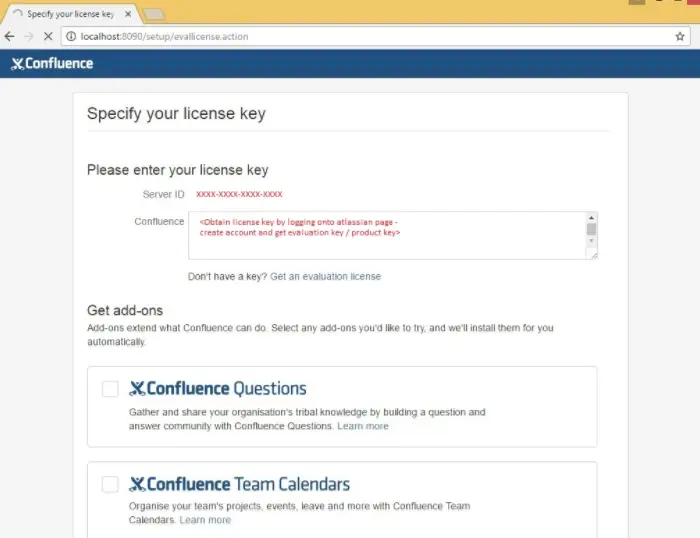
5. Enter License Key (Trial or Production).
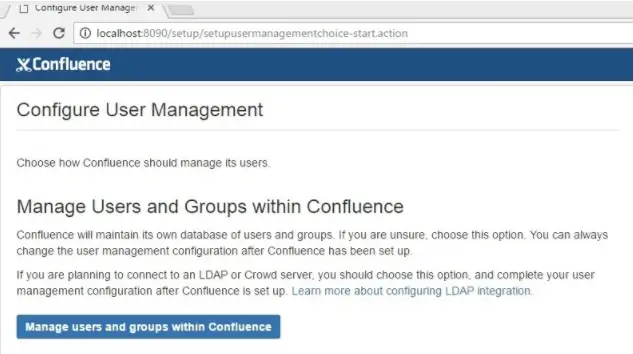
- Choose‘Manage users and groups within Confluence’.
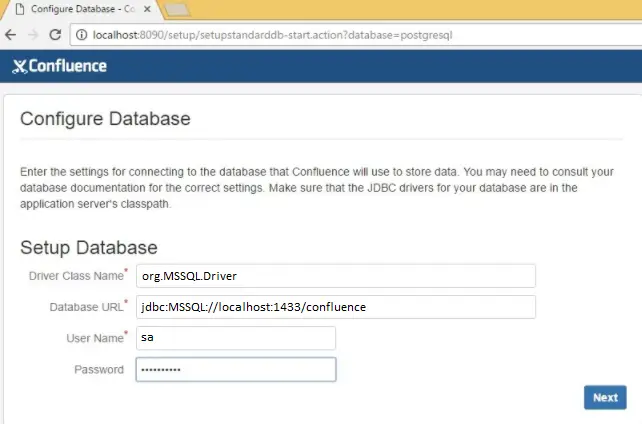
- Database connectivity: Install confluence using External Database. We will create a database in MSSQL to start with the default DB installation.
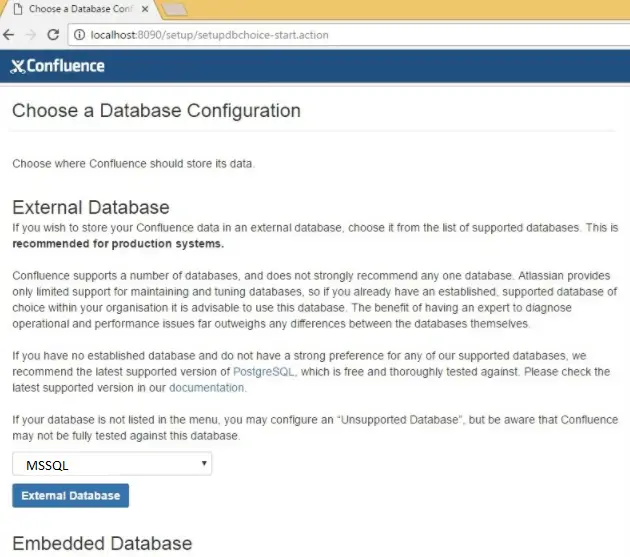
- Assign Database name and credentials.
- On the next page select Empty Site tab to create an empty site of confluence.
- If you already have a working copy of confluence in your environment and if you want to restore this copy on the newly installed copy, then you will perform these two steps.
- Stop confluence service and restore old/production database to newly installed database.
- Replace Attachments folder from old production confluence to new confluence installation.
Note: The Collation of Database in Confluence version 5.5.2 is Latin1_General_CI_AS.
upgrade confluence 5.x to recent version
To upgrade confluence 5.x to recent version, we will first upgrade it on 5.10 otherwise you will face the error during the upgrade.
Confluence Version 5.10 to onward will work on Collation SQL_Latin1_General_CP1_CS_AS. So before the upgrade we need to change the Collation of database. Follow these steps.
-
Run the following query, to check whether the server has full text indices enabled or not.
USE [old database name]
SELECT fulltextserviceproperty(‘isfulltextinstalled’)
If the above query results 1, we will have to identify which tables have indices and delete them (If the outcome is ‘0’, please proceed to next section).
- Identify which tables have full text indices.
- Delete full text indicesof the tables.
- Also remove the full text catalogue.
2. Does this apply to you?
Run the following query against your old database. If it returns any results, you must adjust the collation before upgrading to newer versions of Confluence.
SELECT object_name(object_id) as TableName, name as ColumnName, collation_name
FROM sys.columns
WHERE collation_name <> ‘SQL_Latin1_General_CP1_CS_AS’
AND object_name(object_id) NOT LIKE ‘sys%’
AND object_name(object_id) NOT LIKE ‘queue%’
AND object_name(object_id) NOT LIKE ‘file%
AND object_name(object_id) NOT LIKE ‘spt%’
AND object_name(object_id) NOT LIKE ‘MSrep%’
3. Creating the new Database
Firstly, create a new database as per our Database Setup for SQL Server guidelines. Ensure the collation is set to SQL_Latin1_General_CP1_CS_AS.
4. Creating the Database Tables
We’ll create the database tables from your existing database. In SQL Server Management Studio, right click on your old database:
- Click “Tasks” » “Generate Scripts…”
- In the “Choose Objects” screen, choose “Select specific database objects”
- Tick “Tables” – this selects all the objects in the database, but not the database itself (since we already created the new database)
- On the “Set Scripting Options” click “Advanced” and adjust the following options:
- Set “Script USE DATABASE” to false
- Set “Script Full-Text Indexes” to true
- Set “Script Indexes” to true
- Click “Next”, then “Finish”
- Run the script against your new database. At this point, your new database will contain tables, but no data.
5. Disabling Constraint Checks before importing
Before we import the data, we must temporarily disable constraint checks against all tables in the database. Execute the following query against your new database:
EXEC sp_MSforeachtable”ALTER TABLE ? NOCHECK CONSTRAINT all”
6. Importing Data from the Old Database
In SQL Server Management Studio, right click on your old database:
- Click “Tasks” » “Export Data…”
- In the “Choose a Data Source” screen, ensure your old database is selected. Then click “Next”
- In the “Choose a Destination” screen, provide the connection information for your new database. Usually, this will be the same server, however you can use any SQL Server you can authenticate against. Then click “Next”
- Choose “Copy Data from one or more tables or views” then click “Next”
- In the “Select Source Tables and Views”, ensure all tables are ticked, and that all tables have been highlighted
- With the tables highlighted, click “Edit Mappings…”
- Ensure the correct schema has been selected (DBOis usually the correct schema) and that “Enable Identity Insert” has been ticked. Click “OK”
- Click “Next” and complete the transfer of data. Depending on the size of the database, and the speed of the database server(s) being used, this process will take time.
7. Re-enabling Constraint Checks after importing
Once the import has been completed, you must re-enable constraint checks on the database. Execute the following query against your new database:
EXEC sp_MSforeachtable “ALTER TABLE ? WITH CHECK CHECK CONSTRAINT all”
- Start confluence and Select upgrade option to upgrade it to version 5.10.
- Adjust your Confluence database connection (data source in confluence.cfg.xml) to point to the new database.
- Start Confluence and ensure that everything is working correctly
- After successful upgrade from 5.5.2 to 5.10. we will run the latest version 6.10 and select upgrade option for the upgrade.
- Adjust Confluence database connection (data source in confluence.cfg.xml) to point to the new database.
- Start confluence and ensure that everything is working fine.